

The Stampin' Up! SAMs (Service Account Managers) gave those of us who have a SAM one of these for attending Leadership this year. I was THRILLED to get mine! Of course, I had to make a few when I got home and my Stamp Clubs made them last month! They are made with the Fun Flower Large Bigz Die.
Would you like to make one yourself? OK! Let's go!
Supplies:
- 1/2 sheet cardstock (I used Melon Mambo and Daffodil Delight)
- Coordinating Classic Ink (Rose Red and Melon Mambo)
- Fun Flowers Bigz Large Die
- Designer Buttons
- Stampin' Dimensionals
- Mini Glue Dots
- Sponge Daubers
- Linen Thread and Key Trinket (Optional)
- Glimmer Brad (Optional)
- Small greeting for front

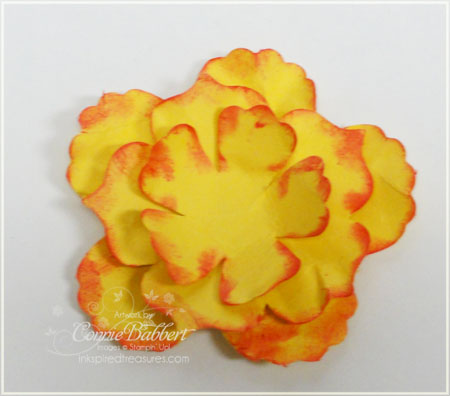
Step 1. Cut blossoms and circle from Fun Flowers Large Bigz Die from cardstock of choice. I used Daffodil Delight.

Step 2. Spritz cardstock heavily with water and crumble up into individual balls.

Step 3. Unfold and use a Sponge Dauber to add ink along edges...it is best if cardstock is still wet so the ink runs naturally. I used Melon Mambo.

Step 4. Form into flower shape and let dry completely. (If you are impatient like me, use the heat gun!) Apply Stampin' Dimensionals to backs of two smaller flowers.
Step 5. Layer each blossom on top of the other.

Step 6. Apply one Stampin' Dimensional to back of largest flower and adhere one end of ribbon to Stampin' Dimensional.

Step 7. Cover back of ribbon with circle cut from Fun Flowers Die.

Step 8. Decorate front. For this one I used a Gold Glimmer Brad in the center of the Early Espresso Designer Big Button (Sweet Stitches) and added the word Fabulous from Stampin' Up!'s Fabulous Phrases stamp set in Early Espresso Classic Ink on Whisper White and used a Mini Glue Dot to attach to the button.

Step 9. Slip ribbon thru book to mark the page and have flower resting on top of book!
NOTE: The pink one above was done with Melon Mambo cardstock with Rose Red sponging on the edges. I used Linen thread and tied on the Key trinket, then tied a bow. I stamped "for you" from Clearly for You in Early Espresso Classic Ink, along with the floral print stamped off in Melon Mambo on the background.
That's it! Leave a comment and let me know what you think. I'd love to see if you make one, too! Hope you enjoyed this month's Thrifty 3D Wednesday post from Stamping 411!


Thanks, Connie! This is beautiful, a great gift.
ReplyDeleteI demo'd these at a crop, the ladies loved them...used very similar techniques as you did. We used designer paper, and that gave a really different look.
ReplyDeleteThank you so much! I have looked at these and hoped that someone would do a tutorial. The fact that it is free is even better!
ReplyDeleteCindy in Illinois
Love these, Thanks for sharing them with us.
ReplyDeleteMichelle in BC
Connie, thanks for the great tutorial!
ReplyDeleteBeautiful, thanks for the free tutorial. I'm going to make these for people at work!
ReplyDeletethey do look sooooo cool, and as you say nice and easy.
ReplyDeleteYou're making me put that flower die on my next order! Seriously, thanks for the great tutorial. These are beautiful.
ReplyDeleteLove these bookmarks. My granddaughter is going to go nuts over them when she visits. She is a stamper and we spend quite a bit of time doing that when she is here and she ALWAYS makes bookmarks for the next year. These will be great! Thanks so much!
ReplyDelete