Good morning stampers!
We're back this week with another great "How To" Wednesday post!
This week's fun and easy tutorial comes to us from the fabulously talented Lee Conrey, one of our own Stamping 411 Operators. As you know if you are a regular follower of our blog, Lee has a beautiful, distinctive style that just screams clean, simple and elegant! Her art work is loved by so many and we are fortunate to have her as part of the team here. But did you also know that Lee is a Stampin' Up! rockstar as well? She earned a spot among the Rising Stars in her first year as a demonstrator! And I know I speak for the whole Stamping 411 team, she is a joy to work with!
Let's take a look at what Lee has shared with us today - the narrative is in her own words:
"I have had so many requests for a Tutorial on how I make my Rhinestone Brad Bows….so here you go……
First you need some of our wonderful Satin Ribbon from Stampin’ Up! - I find that works best, and a Rhinestone Brad.
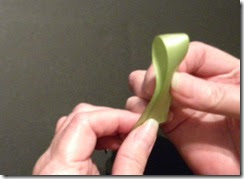
 Flip the ribbon over as the smaller loops will go face down into the brad and pinch together in the center as shown below.
 Flip over and
Voila! Instant Ribbon Bow!
Of course you will want to fluff up your ribbon a bit, but that’s it."
 Thanks so much Lee! This is a beautiful way to make a bow and oh, so easy too!
Lee says to use Mini Glue Dots to attach your bow to your projects, that is her adhesive of choice for these embellishments.
So now that you know 'HOW', show us your stuff! We'd love to see your bows on your gorgeous projects! If you create something using this tutorial, leave a comment with a link to your project so we can view it - you are all so creative, we know you'll take this and run with it!
Be sure to come back tomorrow for Patti's Thursday Color Challenge!


I love these bows. I've always called them "cheater" bows for those of us who can't tie :)
ReplyDeleteWhat a great way to make a bow. Thanks for sharing with us.
ReplyDeleteGreat tutorial!
ReplyDeleteWhat a pretty bow! Thanks for the tutorial!
ReplyDeleteVery clear tutorial. I could even do this! :) I need to find a fun brad and try this. Thanks for blessing my day!
ReplyDeleteWhat a great tutorial! Thanks for sharing.
ReplyDeleteVery pretty! Thanks for sharing a great tutorial!!
ReplyDeleteJudy
Very creative. TFS! Can you tell me the length of the ribbon?
ReplyDeletecarlson_susan at hotmail dot com
Thanks for the great idea and easy tutorial. I can see me trying a lot of these.
ReplyDeleteWhat a great tutorial! I'm bow challenged so this is great for me! Thanks!
ReplyDeleteGreat bow!
ReplyDeleteLOVE THESE.
ReplyDeleteSo pretty and oh so easy. Thank you for a great tutorial.
ReplyDelete