Thursday, January 20, 2011

Technique Thursday - Kissing

It's time for another edition of Technique Thursday, and I thought in honor of the upcoming Valentine's Day holiday I'd highlight "kissing" this week! This is a fun and easy technique.

Supplies you'll need:
  • Solid Stamp
  • Patterned Stamp
  • Classic Stamp Pads


Step one:
Ink the solid stamp with the color of your choice, for this card I've used Cherry Cobbler.

Step two:
Do NOT ink up that patterned stamp. Lay the inked solid stamp facing up, and press the patterned stamp onto the solid stamp, making sure to stamp off the ink onto your grid paper after each time you apply it to the solid stamp. When you're done, your solid stamp will look something like this:

Step three:
Huff (breathe moist air) onto the inked stamp, as it may have begun to dry as you were adding your pattern.

Step four:
Stamp onto card stock, this is what they will look like:
Here are two samples using this technique:

Supplies used on the above card:
Stamp Sets: I {heart} Hearts, Circle Circus
Ink: Cherry Cobbler
Card stock: Whisper White, Basic Black, Cherry Cobbler, Pretty in Pink
Accessories: Framed Tulips embossing folder, Paper Piercing tool, Assorted Buttons (neutrals, subtles & regals), Mini Glue Dots to adhere the buttons, dimensionals.

Supplies used on the above card:
Stamp Sets: I {heart} Hearts, Circle Circus, Teeny Tiny Wishes
Ink: Elegant Eggplant, Melon Mambo, Tempting Turquoise, Basic Black
Card stock: Whisper White, Basic Black, Melon Mambo
Accessories: Basic Rhinestones, Word Window Punch, Modern Label Punch, dimensionals (behind center heart), Polka Dots embossing folder.

I hope you've enjoyed this quick tutorial, and maybe you'd even like to create a sample of your own! Link up below so we can see what you've come up with!!

Wednesday, January 19, 2011

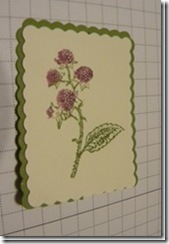
"How To Build" A Scallop Mat

Hi Everyone,
Ever wonder how to make the mat for the Clearlits Scallop Rectangle? Well today I’m going to show you how.
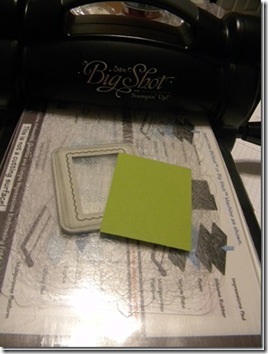
You will need your Big Shot, Your Sizzix Clearlits Scallop Rectangle (boy that’s a lot of words for this little thing) and scraps of card stock. Paper Snips and Snail Adhesive for the assembly.
First you will cut out three Scallop Rectangles using your Big Shot
how to wednesday 1-26-2011 227_thumb[8]
You’ll need two for the mat and one for the image piece
how to wednesday 1-26-2011 229_thumb[6]
Stamp your Image on your Image Piece
how to wednesday 1-26-2011 230_thumb[1]
Cut the two Mat Pieces in half…..one vertically and one horizontally.
how to wednesday 1-26-2011 231_thumb[1]
Apply Snail to the back of the image piece
how to wednesday 1-26-2011 232_thumb[1]
…and start building your mat by lining up the scallops and leaving a slight edge. Don’t worry too much about the corners they wont match exactly
how to wednesday 1-26-2011 233_thumb[1] how to wednesday 1-26-2011 234_thumb[1]
Once you’ve got two sides on flip it over and add more Snail to the Mat for the top and bottom pieces
how to wednesday 1-26-2011 235_thumb[1]
Line up as before to complete the mat on the top and bottom.how to wednesday 1-26-2011 236_thumb[7] how to wednesday 1-26-2011 237_thumb[9]
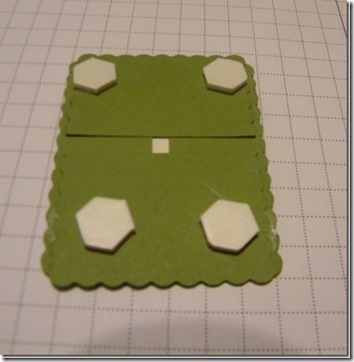
Attach Dimensionals to the back of the Mat and Build your card.
how to wednesday 1-26-2011 239_thumb[8]
how to wednesday 1-26-2011 242_thumb[5]
That’s it for today. I hope you enjoyed this little “How To”
See you next time!!!
Lee

Friday, January 14, 2011

Saturday Sketch Challenge #186


Hello everyone and welcome to Stamping 411 and a new Saturday Sketch Challenge!

Today's sketch uses a simple technique that we sometimes forget about -- tearing! Tearing your cardstock or DSP adds great interest and texture and is a fast, easy and very inexpensive way to dress up a card or project!

Here's one possible set of measurements that you might use for this sketch:

  1. Layer One -- Cardbase cut at 5.5 x 8.5", scored and folded
  2. Layer Two -- Cardstock cut at 4 x 5.25"
  3. Layer Three -- Cardstock of DSP cut at 4" wide and torn at approximately 4"
  4. Layer Four -- DSP cut at 2.5 x 3.5"
  5. Layer Five -- Cardstock cut at 2.25 x 3.25"

Okay! Are you ready for some inspiration from your Stamping 411 Operators? Here you go ...


Lee Conrey


Patti Chesky


Kerin Sylvester


Tiffany Bauer


Have we inspired you to try this sketch on your own? We hope so! We can't wait to see what you create this week! Once you've created your project, taken pictures and posted them on your blog or other Public Forum, come back and leave your link below! We're waiting to see your creations!
Thanks everyone ... and Happy Stamping!