Friday, April 29, 2011

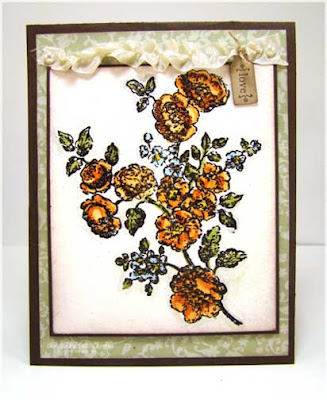
Saturday Sketch Challenge 201

What a wonderful week of surprises, guesses and fun! Thanks for playing along with us on name that operator. It's so hard to believe that we've been bringing you sketches for nearly two years now! So very cool!

So how about some approximate measurements for this weeks' sketch:

Layer 1: 4-1/4 x 11", scored at 5-1/2"
Layer 2: 3 x 1-3/4"
Layer 3: 1-3/4 x 2-1/2" strip
Layer 4: ribbon/bow across front of card


Are you ready to play along? We sure hope so! Never played with us before?? Well, it's easy! Sky's the limit!


  1. Make a card using your Stampin' Up Supplies!

  2. Post it online somewhere to your blog or other online forum

  3. Post a link to the free linky tool below (please point the link to your post and NOT just your blog)

  4. Have some fun and leave comments for each other (and for the operators if you like their work). ~ Everyone loves comments!

  5. Please note, we reserve the right to remove links with non-Stampin' Up! product, "sales pitches", links to online stores, or requests to join your team. We're here to have fun, learn from one another and share.

We hope you join us this week and play along with this sketch! But don't delay our links will close at 8AM on Thursday morning Eastern Standard Time.

Have A Great Week!

Stampers Showcase #200

What a wonderful group of artwork this week, and what fun we had offering blog candy to you! I hope you caught the fever, we even had ourselves stumped! :D

Here are your operator picks for this week. See you tonight for another fun sketch!

Thursday, April 28, 2011

Takin' It To the Top Thursday with Hello Blossoms!

Happy Thursday morning to you and welcome to another monthly edition of Takin' It To the Top Thursdays on Stamping 411! This is the monthly feature where I take one basic card and step-it-up two more times to show you just how easily you can dress up your cards and projects with a few simple additions. By adding extra layers, texture, and embellishments you can take your project from basic to beyond!

Today's cards all feature the darling new individual stamp from Stampin' Up! called Hello Blossoms. It will be available in the Summer Mini Catalog beginning on May 1st. I think this little stamp is destined to be a best seller ... it's happy and bright, fun and whimsical and perfect for a summer-time thinking of you note. Perfect as well for today's edition of Takin' It To the Top!

So, here's the first card for today. Basic with just a few layers and not a lot of embellishments. It's still a great card and perfect for beginning stampers or when you need to make quick multiples.


The card base is Daffodil Delight cut at 4.25 x 5.5", scored and folded. I added a layer of Melon Mambo Cardstock cut at 2.75 x 3.75" and then Whisper White cut at 2.5 x 3.5". I applied Stampin' Write Markers directly to the rubber using the colors of Old Olive, Pumpkin Pie, Perfect Plumb, Daffodil Delight, Marina Mist and Melon Mambo. Add a bit of 3/8" Taffeta Ribbon and a bow and the card is complete!


But look what a difference just a few simple changes makes! For this second card, I added an additional layer with a Certainly Celery Cardbase and the Daffodil Delight layer cut at 4 x 5.25". I also dressed it up a bit with the Big Shot and the Tulip Border Impressions Folder. The Melon Mambo and Whisper White layers and the stamping are all the same. But I added a small strip of Old Olive Cardstock punched with the Scallop Border Punch at the bottom before applying the ribbon and bow. See, just a few smiple changes but what a difference it makes for this card!


Now here's the final card. Again, just a couple of additons are all I did to change this one up and Take It To the Top! I added a double bow, instead of the tied-on faux bow in the previous two cards. And I gave some movement and dimension to the card with a whole flock (is that the right word for a group of butterflies? If you know, leave me a comment!) of tiny, colorful butterflies cut with the Beautiful Wings Embosslet and the Big Shot. That's it ... those are the only additions for this final card. But those two additons make this darling little card even more happy and bright than before. And what a thrill this card will bring to the one who receives it!


Well, that will about wrap it up for this edition of Takin' It To the Top!


I hope you've enjoyed seeing how you can take one basic card and step it up with just a few simple additons!


If you get ambitious this week and decide to take on of your creations to the top, stop back and leave us your link below. We would love to see how you Take it to the Top this Week!


Thanks so much for visiting today! All the Stamping 411 Operators hope you've been back soon!


Blessings, Gretchen


Wednesday, April 27, 2011

Guess That Operator - Revealed!!

This week has been so much fun celebrating our 100th sketch! If you don't know about our Guess That Operator game, click HERE to read Friday night's post. The response from our readers has been great, and boy there seems to be a bit of confusion as to who made which card...and the Operators seem to be stumped as well!!

Are you ready to finally know who made each card? Drum roll please...


Tiffany Bauer

Sooooo....how'd you do? Did you guess some/any of them right??? Don't forget the other part of this fun game...each of the Operators is giving away blog candy on her personal blog over the next couple of days, so go check them out and see who won!!

We'll be back with another sketch on Friday night, so come on back k??

Friday, April 22, 2011

Saturday Sketch Challenge #200 and Blog Candy!!

Wow, can you believe we have reached our 100th sketch this week?!?! How exciting!! You, our readers are really the driving force behind our creativity and drive to keep giving you fresh ideas to work with. You come back week after week, to see what we've made and play along, and we're inspired by YOU and what you submit each week using our sketches!! So thank you for helping us reach our 100th sketch!!

This week we are going to play a little game to put a fun twist on things, and reward some of our readers with Blog Candy :) Remember last year when we played a little game of guess who in honor of our one year anniversary? If you'd like to look back you can check out that post HERE. Anyway, that game was so much fun, we decided to play again for our 100th sketch!!

This is how it goes...each of the Operators is posting a card this week that is NOT theirs. They all emailed pictures of their cards to me, I attached a watermark, and randomly sent them back to other Operators to post. I'm the only one that knows really whose card goes with who...I love this job :)

Here's how YOU can win some sweet blog candy! Visit each of the Operators' blogs, and leave a comment as to whose card you think they've posted, simple as that! Each Operator will choose a winner, and all winners will be revealed on Wednesday, April 27th. Sound like fun!?!?

Okay, so now you probably want some inspiration to get you going right? I'm guessing at possible measurements here so I don't give away which card is mine:

Layer 1: 5-1/2 x 8-1/2", scored at 4-1/4"
Layer 2: 4 x 5-1/4"
Layer 3: 1 x 5-1/4" strip
Layer 4: 2 x 5-1/4" strip layered on top of Layer 3
Layer 5: ribbon/bow across front of card
Layer 6: Shape of your choice

Here's what your Operators' have NOT come up with this week (haha):


Connie Babbert


Lee Conrey


Are you ready to play along? We sure hope so! Never played with us before?? Well, it's easy! Sky's the limit!


  1. Make a card using your Stampin' Up Supplies!

  2. Post it online somewhere to your blog or other online forum

  3. Post a link to the free linky tool below (please point the link to your post and NOT just your blog)

  4. Have some fun and leave comments for each other (and for the operators if you like their work). ~ Everyone loves comments!

  5. Please note, we reserve the right to remove links with non-Stampin' Up! product, "sales pitches", links to online stores, or requests to join your team. We're here to have fun, learn from one another and share.

We hope you join us this week and play along with this sketch! But don't delay our links will close at 8AM on Thursday morning Eastern Standard Time.

Have A Great Week!
~Kerin


Stamper's Showcase #199


Did you see all the wonderful creations submitted for this week' Sketch Challenge? YOU are all AMAZING!!!! Here are your Operator Picks for Sketch Challenge #199.

Thursday, April 21, 2011

Color Inspiration #155


As the weather warms, there's lots of activity at the neighborhood playground. The colors from a little one's Spring jacket inspired me for this week's Stamping 411 Color Inspiration Challenge.

This week's colors are: Crumb Cake, Pacific Point, Tangerine Tango and Riding Hood Red.

If colors could talk, this group would be the ones the parents would be "sssshhhh"-ing. They would be having too much fun together.

I would love for you to have some fun with these colors. If you post a project using this color combination, please copy your project's web address into our Linky Tool at the bottom of this post. That way we can all "oooooh" and "aahhh" over it!!!

Wednesday, April 20, 2011

How to ~ Watercolor with Markers

Good Morning Friends!

I'm filling in for Lee's post this week with a little tutorial I wrote this past Monday. Got to love the team work here!

I've been playing with the new sneak peek set recess to make thank you cards to those who give donations towards a new playground for the school across the street from my home.

The paper is also a sneak peek and comes from a new simply scrappin kit that will be available through your SU! demonstrator on May 1st!

Base: 5 1/2" x 8 1/2", scored and folded at 4 1/4"
Layer 2: 5 1/4" x 4, rose red
Layer 3: 5 1/8" x 3 7/8", daffodil (dont worry too much about seeing a crazy measurment, this layer is only 1/8" smaller than layer 2.. So you would just make it smaller by moving it over two lines on your paper cutter.
Layer 3a: There's a scalloped sticker under there, that I got from the simply scrappin kit.. Almost forgot to put that in the directions!
Layer 4: 4 1/8" x 3 1/8" rose red
Layer 5: Designer paper from a new simply scrappin kit coming out next month! 3x4 (note** you get 12 of these from one piece of designer paper, so with 3 sheets, you could make 36 cards).
Layer 6: 2 1/2" x 3", whisper white.
Layer 7: A self adhesive die cut from the same simply scrappin kit.. I used dimensionals to attach that on the card
Layer 8: Water colored piece, cut with a 1 3/4" circle punch. 119850

That gorgeous bow is tied with Rose Red seam binding, which I'm told will be available for purchase after the mini catalog is gone at the end of the month.. Yea!!! That bow was tied by hand using the "bunny ears" method. It's the same method I'm trying with Alexis to help her learn to tie her shoes. But that's a post for another day...

Now down to the tutorial...

1. You'll need some aqua painters, and markers to match the project you're working on. I don't like to add too many colors and try and stick to the colors that match my designer paper. The aqua painters are on page 195 (item 103954) and you get two sizes. For watercolor with markers I prefer the smaller brush size.

2. Fill your brush with water, then find something plastic to draw on with your markers. A sandwich bag, a stamp case.. anything plastic will do. Here I used a clear block.
3. Stamp your image in stazon ink. (101406 Jet Black Stazon, page 195). It's important to use an ink that's not going to move when you add water. Stazon.....stays-on.. :D

4. Draw a line with your sky color. This will be your horizon line. Pick up and "GENTLY" water down your blue color and wash it on your background, leaving your focal point white.
5. Repeat the process with the ground.. It's perfectly okay if the line isn't perfect.. Maybe she's standing on a hill! :D

If you look just to the left of her foot, I just added a patch of old olive ink there in a watery stroke. Then, the most important part is... STOP!!! :D A good artist knows when to stop, it's so important to do it sort of quickly and not over do it. If you do, the paper will only absorb so much water, unless you use watercolor paper.. Even then, quick is better. Get it on there and stop... :D
6. I colored her face with blush blossom, and her hair with daffodil, full strength. I could add some brown or black, or change the skin color if necessary.. Alexis says, "oh look mom, you are coloring ME!"

7. Add some color to one section of the focal point.. choose a corner.. in this case I did bottom left and added some color straight with my marker. Then I blended it with the aqua painter. If the line is still too defined, just go pick up a little marker color from the plastic palette you made.
8. I colored the hula hoop with a straight marker in pumpkin pie and photographed it without a flash so you could really see the colors. See how the color was just washed on for the background. I used circles with my brush when adding the color.
9. Here's the 1 3/4" circle punch. I just punched her out and stuck her down as my focal point. :D

That's all from your operators for today!!! I hope you enjoyed this tutorial! :D Oh and heck! Want to try it for yourself? I opened a linky for watercolor with markers.. If you are inspired to make a stampin' up card with this tutorial, please link it up and let us see too!!


Rubbah hugs,
Selene Kempton

Friday, April 15, 2011

Saturday Sketch Challenge #199

Happy Friday night everyone! Wow, another week has come and gone and it's time for a new sketch challenge from your Operators! Last week we announced our switch to ALL STAMPIN' UP! and the response has been great!!

In case you haven't visited before, here's a bit of the scoop... this is a marketing FREE zone, and we ask that when you play along and link to our challenges that you use Stampin' Up products only. More details may be found at our post here.

Okay, now let's get to the sketch! We've got a pretty simple one for you tonight, and here are some possible measurements:

Layer 1: 5-1/2 x 8-1/2", scored at 4-1/4"
Layer 2: 4 x 5-1/4"
Layer 3: 2-3/4 x 3-1/4"
Layer 4: 2-5/8 x 3-1/8"

Here's some inspiration from the Operators:


Gretchen Barron


Kerin Sylvester

Are you ready to play along? We sure hope so! Never played with us before?? Well, it's easy! Sky's the limit!
  1. Make a card using your Stampin' Up Supplies!
  2. Post it online somewhere to your blog or other online forum
  3. Post a link to the free linky tool below (please point the link to your post and NOT just your blog)
  4. Have some fun and leave comments for each other (and for the operators if you like their work). ~ Everyone loves comments!
  5. Please note, we reserve the right to remove links with non-Stampin' Up! product, "sales pitches", links to online stores, or requests to join your team. We're here to have fun, learn from one another and share.
We hope you join us this week and play along with this sketch! But don't delay our links will close at 8AM on Thursday morning Eastern Standard Time.

Have A Great Week!
The Operators