Friday, October 28, 2011

Saturday Sketch Challenge 227

Good Evening Friends!

Tonight we have another simple sketch for you! You can choose to keep this one simple, or bump it up and embellish! It's all up to you.

Here are some potential measurements for this week's sketch. Again.. you can use this as a jumping off point and change it any way you like!

Base:11 x 4 1/4", scored and folded in half at 5 1/2"
Layer 2: 5 1/4" x 4
Layer 3: 5 x 3 3/4"
Layer 4: add a layer of ribbon.
Layer5: any punched shape or layers of punched shapes.. have fun!!!

Speaking of FUN!... Have you been following our guest designer's projects? Carrie Gaskin is an amazing paper crafter/artist and we're so lucky to have her as a guest designer this month. Please stop by her blog and let her know you saw her project here (and how much you LOVE it!)

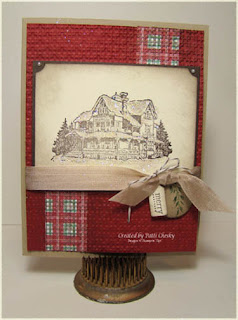
Here are the samples from your operators this week:


Are you ready to play along? We sure hope so! Never played with us before?? Well, it's easy! Sky's the limit!
  1. Make a card using your Stampin' Up Supplies!
  2. Post it online somewhere to your blog or other online forum
  3. Post a link to the free linky tool below (please point the link to your post and NOT just your blog).
  4. Have some fun and leave comments for each other (and for the operators if you like their work). ~ Everyone loves comments!
  5. Please note, we reserve the right to remove links with non-Stampin' Up! product, "sales pitches", links to online stores, or requests to join your team. We're here to have fun, learn from one another and share.
We hope you join us this week and play along with this sketch! But don't delay our links will close at 8AM on Thursday morning Eastern Standard Time.

Rubbah hugs,
Selene Kempton

Stamper's Showcase #226


Hello everyone and congratulations and thanks to all who played along with this past week's challenge! Great job, one and all! But alas, we could only pick a few for the showcase. Here are your Stamping 411 Operator picks for Sketch Challenge #226. Enjoy!!!

Thursday, October 27, 2011

Pennant Parade Set Sampler!


Hi!! Welcome to my first "Whatever Thursday" post! Today's "whatever" is a set sampler!! One stamp set, several different looks!! Today's set is Pennant Parade--a super fun set!

This first card shows you a card you might expect from this set:

Yes, it's a birthday card, using the pennant stamp as......pennants!! This is very easy to do with the coordinating Petite Pennants Builder Punch!

Look, you can use this same stamp as a Christmas tree:

Just turn it upside down!! And, I colored in the garland with a Riding Hood Red Stampin' Write Marker.

In keeping with the "upside down" theme, here are some fun ice cream cones:


The ice cream scoops are 1 3/4" circles! I punched a template from a window sheet, then sponged in with Pretty in Pink ink! Wouldn't this make a sweet card for a little girl?!

Now, this card is just wild!!! LOL!!! I used the same stamp from the previous card, and created a back ground!!I started with Not Quite Navy ink, and stamped a row of the pennants. I used my stamp-a-ma-jig to make sure they were somewhat straight! I continued all the way down with the Not Quite Navy pennants, then came back and "filled in" with the Cajun Craze Pennants! Would make a fun card for a special guy's birthday!!

I hope you enjoy the Set Sampler!! We'll see you tomorrow for another great sketch challenge!!

Supplies used:
Happy Birthday Card: White, Pumpkin Pie, Pacific Point and Melon Mambo cardstock and ink; Brights Patterns Stack; Big Shot, Petal Cone Die, White Baker's Twine, Petite Pennant Builder Punch, Stampin' Dimensionals

Merry Card: Lucky Limeade, Early Espresso, Riding Hood Red and Naturals White Cardstock; Lucky Limeade, More Mustard & Early Espresso Classic Ink; Riding Hood Red Stampin' Write Marker; Petite Pennant Builder Punch; Chocolate Chip Scalloped Dots Ribbon, Big Shot, Snow Burst Embossing Folder, small oval punch, stampin' dimensionals

Ice Cream Cone Card: Pretty in Pink, Early Espresso and Whisper White cardstock; Early Espresso and Pretty in Pink Classic ink; stampin' sponges, pretty in pink 1/4" grosgrain ribbon; small oval punch

Background Card: Not Quite Navy, Cajun Craze and Very Vanilla cardstock; Not Quite Navy & Cajun Craze Classic Ink; stamp-a-ma-jig; Modern Label punch, word window punch; Very vanilla satin ribbon


Friday, October 21, 2011

Saturday Sketch Challenge 226

Good Evening Friends!

Thanks for popping by to see us! To those of you who had questions about Lee's post yesterday... go look at the post, it should be updated! :D

Tonight we have another simple sketch for you! You can choose to keep this one simple, or bump it up and embellish any way you choose!

I always love a sketch as a jumping off point for projects and hope that you love this one!

If you're just starting out stamping, learning to measure and put projects together can be tough... then as you do it more often, it becomes easy! Here are some potential measurements for this week's sketch. Again.. you can use this and change it any way you like!

Base:11 x 4 1/4", scored and folded in half at 5 1/2"
Layer 2a (top): designer paper 4 x 2"
Layer 2b (middle): designer paper 4 x 2"
Layer 3: add a layer of ribbon... try adhering it, so that the "ends" sit under the punched shape, and you can see the ribbon inside your card. Add a bow or another shape if you like to this layer as well.
Layer 4 & 5: any punched shape or layers of punched shapes.. have fun!!!

Speaking of FUN!... Have you been following our guest designer's projects? Carrie Gaskin is an amazing paper crafter/artist and we're so lucky to have her as a guest designer this month. Please stop by her blog and let her know you saw her project here (and how much you LOVE it!)

Here are the samples from your operators this week:


Selene Kempton


Lee Conrey

Are you ready to play along? We sure hope so! Never played with us before?? Well, it's easy! Sky's the limit!
  1. Make a card using your Stampin' Up Supplies!
  2. Post it online somewhere to your blog or other online forum
  3. Post a link to the free linky tool below (please point the link to your post and NOT just your blog).
  4. Have some fun and leave comments for each other (and for the operators if you like their work). ~ Everyone loves comments!
  5. Please note, we reserve the right to remove links with non-Stampin' Up! product, "sales pitches", links to online stores, or requests to join your team. We're here to have fun, learn from one another and share.
We hope you join us this week and play along with this sketch! But don't delay our links will close at 8AM on Thursday morning Eastern Standard Time.

Rubbah hugs,
Selene Kempton

Stamper's Showcase #225


Holy Smokes, Batman!!! WOW -- Stamping 411 participants just keep getting better and better! I know I say that every week, but this week we had some exceptional cards submitted for our Saturday Sketch Challenge. Just look at the Operator Picks! AMAZING! Thanks, one and all, for playing along and we hope you keep coming back for more!

Thursday, October 20, 2011

How to make an "Envelope" Gift Card Holder

Hi Everyone,
This is going to be a "Blast from the Past" for you.
Envelope Gift Card Holder 013
Remember the Gift Card Holders that we did with Envelopes? I just remembered it today while helping my downline and decided to share it with you
First you will need any envelope, a Crimper, Ribbon, Cutter, Ink , Punch and stamps of choice.
Envelope Gift Card Holder 001
Then you will seal your envelope….
Envelope Gift Card Holder 002  Envelope Gift Card Holder 003
Next place your sealed Envelope in your cutter and cut at the two inch mark. You will be cutting across the shortest side of the envelope (the 4 3/8 side).
Envelope Gift Card Holder 004
I decided to punch the ends of the top piece….with my Scalloped Edge Punch.
Envelope Gift Card Holder 005
Now take the larger part of the sealed envelope and run it through your crimper….lines will be going straight up and down when set up right.
Envelope Gift Card Holder 007
This is what you will be working with for your Envelope Gift Card Holder…..The top fits nicely over the bottom now. See…
Envelope Gift Card Holder 008  Envelope Gift Card Holder 009
I then took a Snowflake stamp and stamped it on the top with Crumb Cake Ink and sponged Crumb Cake on the Scallops to better define the edges against the bottom.
Envelope Gift Card Holder 011 Envelope Gift Card Holder 012
I cut a piece of Crumb Cake Card Stock to place my Gift Card on…..then I attached a punched piece from our Tab Punch so that the card could be removed easily!
Envelope Gift Card Holder 013
Here is my Decorated and finished Gift Card Holder…I had this extra Snowman sitting on my desk I had done a few days ago…why not right? I attached him to one of the scallops from the Pennant Die and a little Crumb Cake Seam Binding and I’m done.
I hope you’ll give this “Blast from the Past” a try. I had forgotten how fun these were to make.
Have a great Day!

Friday, October 14, 2011

Saturday Sketch Challenge #225


Hello everyone and welcome to a new Saturday Sketch Challenge from your Stamping 411 Operators! We've got a fun sketch and some fabulous inspiration pieces for you this week, designed by our Stamping 411 Operators!

Just look at this fun sketch. You've got some great opportunities here to add those little details that make so much difference!

To help get you started, here are some possible measurements you might use:
  1. Layer One -- Cardstock cut at 5.5 x 8.5", scored and folded to form your Card Base
  2. Layer Two -- DSP or cardstock cut at 4 x 5.25"
  3. Layer Three -- Strips of Cardstock cut at 1.25" wide -- position on left going to the bottom and on right going to the top.
  4. Layer Four -- 3.5" Square for your focal image. Embellish as desired with ribbon and tag punchies of any shape!
Okay, are you ready to be inspired? Just look at what we have for you ...


Are you ready to play along? We sure hope so! Never played with us before?? Well, it's easy! Sky's the limit! Here's what you need to do:

1.Make a card using your Stampin' Up Supplies!
2.Post it online somewhere to your blog or other online forum
3.Post a link to the free linky tool below (please point the link to your post and NOT just your blog).
4.Have some fun and leave comments for each other (and for the operators if you like their work). ~ Everyone loves comments!
5.Please note, we reserve the right to remove links with non-Stampin' Up! product, "sales pitches", links to online stores, or requests to join your team. We're here to have fun, learn from one another and share.

We hope you join us this week and play along with this sketch! But don't delay our links will close at 8AM on Thursday morning Eastern Standard Time.

So, what are you waiting for! Let's get stamping!!!

Blessings, Gretchen