Our fabulous operator Kerin has an amazing tutorial for you today! Make sure you leave Kerin some love if you like it! First, the supplies used for this card are at the top:
Stamps: Inspired by Nature
Ink: Daffodil Delight, Peach Parfait, Pumpkin Pie, Cajun Craze & Cherry Cobbler classic stampin' pads
Card Stock: Shimmery White, Basic Black, Daffodil Delight
Ink: Black StazOn
Accessories: Basic Black Satin Ribbon, Brights Buttons, Linen Thread, plain white copy paper (non-SU!)
Kerin wrote:
"Today I'm going to show you how to sponge a sunset. For my card I've made a large sun, but you can make your sun any size you like, simply by cutting a different sized circle using your Circle Scissor Plus. For this card, I've set my Circle Scissor Plus to make a 3 1/4" circle out of plain white paper.

You will use both pieces of paper after the circle has been cut out, so don't throw away either piece.
*Tip - I prefer Shimmery White card stock for sponging sunsets, the colors seem to blend better with this type of card stock.
First, select the colors you'd like to create your sunset with. I'm using Daffodil Delight for the sun, along with Peach Parfait, Pumpkin Pie, Cajun Craze and Cherry Cobbler for the sunset.
After you've got your circle cut out, lay your piece of plain white paper over your 4 x 5 1/4" piece of Shimmery White card stock. If you use thin white paper, you'll be able to see through it to line up your "sun" where you want it.
We will begin with the sun. Hold the piece of white paper in place, and start sponging outside of the circle, then bring the sponging in, swirling your sponge around in a circular motion as you go.
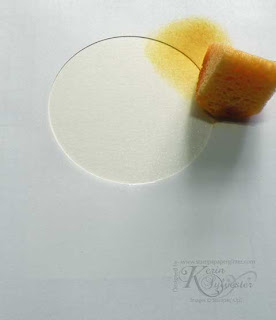
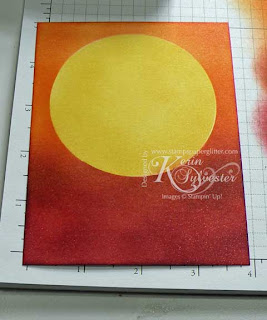
Continue sponging on Daffodil Delight ink until the sun has been completely filled in with ink.
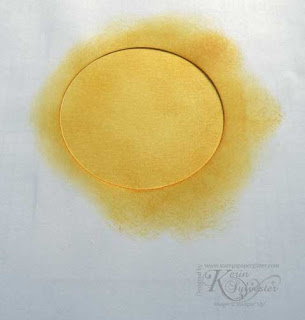
When you remove the piece of white paper, your sun will look similar to this:
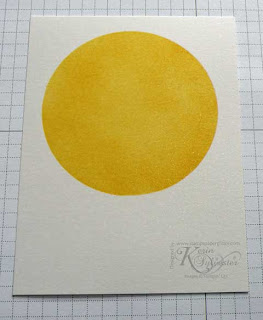
Next, take the circle that you cut out from the plain white paper, and place it over the sun you just sponged as shown.
*Tip - for a smaller sun, punch a circle out of a post it note, and it will already have a sticky back to it to help hold itself in place.
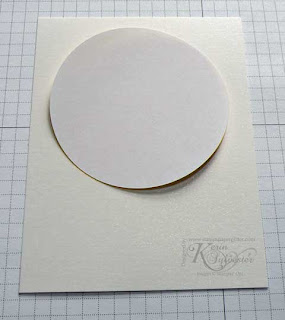
Now start sponging with your lightest color first, in this case it is the Peach Parfait. Again, just like sponging the sun, begin off of the card stock and work the color in from the sides in a circular motion.
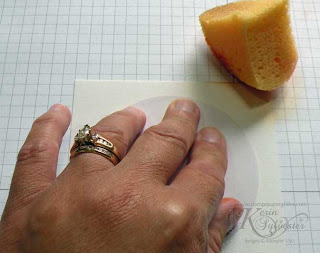
This is what it will look like after adding the Peach Parfait:
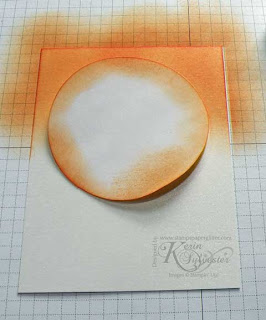
Next add the Pumpkin Pie ink, and overlap the section of Peach Parfait.
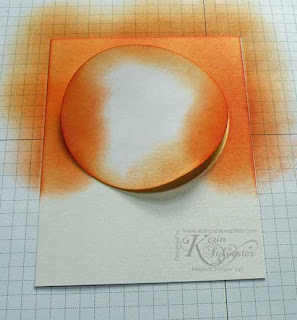
Next sponge on the Cajun Craze.
*Tip -Notice how especially on the darker colors I started rubbing my sponge way off of the card stock, this is because you don't want a dark blotch in your sponged area and you can blend more easily if you just add layers of color.
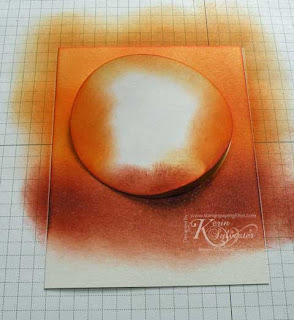
Finally you will sponge on your Cherry Cobbler.
*Tip - Feel free to expand your colors up and down as you like, blending each color in the the color above and below it.
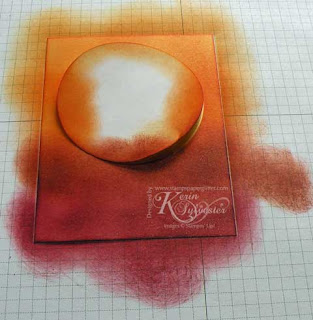
Here is your completed sunset, just stamp and assemble your card!
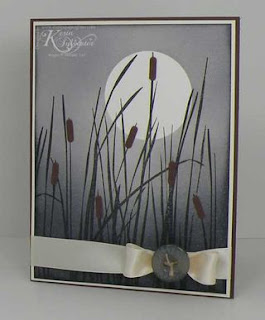
This will work with lots of color combos, here's a card I made in all Basic Gray, I just added the Basic Gray more and more to get the level of darkness at the bottom."
Thank you so much Kerin for your AMAZING tutorial! I'm sure all the Stamping 411 readers will be off to try your technique!
Rubbah hugs,
Selene Kempton


What a gorgeous card and fabulous tutorial ~ I'm going to give this a try even though I'm somewhat of a *newbie* because you've made the tutorial so straightforward and clear ... THANKS for sharing!
ReplyDeleteWonderful instructions! I love love love the gray one!
ReplyDeleteI love this technique. I use it quite a bit in various projects and slightly altered sometimes. Yours is beautiful. And I LOVE THE NEW LOOK OF THE BLOG!!!! Awesome on both accounts.
ReplyDeleteThanks Kerin. It's beautiful. I love sponging!
ReplyDeletethanks so much for showing us this technique. Your choice of colors blend beautifully.
ReplyDeleteOh. My. Goodness! I love this and will have to get some of the shimmery paper ..... or try a piece of the retired Bridesmaid paper ..... or BOTH!
ReplyDeleteLove it
ReplyDeleteGreat JOb!!!!!
wow I have always wanted to try this technique
ReplyDeleteyour inst look so easy and I just love the grey
card good work
Wow ... Fantastic tutorial ... thank you soo much for sharing. Love your work!!!
ReplyDeleteBeautiful!!!!
ReplyDeleteVery beautiful and doesn't look like it would take long to make. Edna
ReplyDeleteThanks for the tutorial, I am such a visual learner. I love both cards. I will play with this technique until I get it right.
ReplyDeleteThanks so much for sharing, just beautiful!
ReplyDeleteFantastic tutorial!!! I actually feel like I can do this! TFS
ReplyDeleteElegant, yet simple. Very nice. Edna
ReplyDeleteWhat a quick and easy way to do this....
ReplyDeleteThanks for sharing!!
I'm glad there is Pinterest cause I love your cards and I wasn't making cards in 2010--happy it came around again!
ReplyDeleteLove the variations of color the sponging provides. Thank you for the easy to follow tutorial.
ReplyDeleteThank you soo much for tutorial!
ReplyDeletevery simple und beutiful!
Hyeyeong
thankyou - very effective
ReplyDeleteJust the right tutorial at the right time, thank you so much.
ReplyDeleteJust the right tutorial at the right time, thank you so much.
ReplyDeleteThat is awesome - great tutorial and easy to do with your guidance.
ReplyDeleteYou make this seem easy. I will try this after the holidays are over. Thanks for your guidance. I am a newbie and need these tutorials.
ReplyDeleteThank you for the tutorial. As above in Phyllis' comment, I'm a relatively new card maker and this tutorial is fantastic. Kind regards. tina
ReplyDeleteBeautiful card. Love the colors on both cards for sunsets. Will have to try it. Raye
ReplyDeleteThat was a awesome tutorial, thank you very much, I dont have any success with swirling on my cards I think I am to heavy handed
ReplyDeleteDale
NewZealand
Beautiful technique, love the card, thanks for sharing with us.
ReplyDeleteLove the gray and white card very much. Thank you, never thought of doing that technique in a monochromatic style. Fantastic. Will start on it right now!!
ReplyDeleteGod bless, Eva
GREAT I NEEDED IDEA FOR GROUP CARD MAKING I WILL TRY THIS THANKS V.R.
ReplyDeleteThank you. I never would have thought of using gray. Love it. OBTW the colourful sun is what we saw today at 4:45 a.m. (airport run).
ReplyDeleteBeautiful, thank you for sharing. Will definitely be using this technique...
ReplyDeleteGreat card! I especially love the gray card, so peaceful. Thanks for sharing this technique!!
ReplyDeleteWhat a fabulous card! I love both of them! Thanks for showing us all the brilliance of the suns, and moons! Blessings, Lee
ReplyDeleteThanks for a great tutorial -very useful for many occasions -|I can see it in blues and white for a Christmas scene.
ReplyDeleteWhat a wonderful technique,the cards have turned out beautifully, will definitely be trying this one out.
ReplyDeleteThank you for sharing
Love the grey one! And I think I could free hand the cattails! Thank you so much for sharing!
ReplyDeleteAwesome idea! Will try it tonight
ReplyDelete